
Re:amaze's Facebook integration supports both your Facebook Page and your Facebook Page's Messenger account. Connecting them allows you to import customer comments and messages directly into your Re:amaze inbox so your team can respond from one place.
Connect Facebook and Facebook Messenger
Before connecting, make sure you are logged into Facebook as the page owner so you can accept all required permissions. Log into Facebook in the same browser as your Re:amaze account to make authentication easier.
- In Re:amaze, navigate to Settings > Social Channels.
- Select Add Social Channel.
- Select Connect Facebook Pages and Messenger.
- Select the page you want to manage via Re:amaze and follow the on-screen instructions to accept all permission requirements.
- Save and update to return to Re:amaze and complete the setup.
Note: If Facebook prompts you to switch to your personal account, select Switch. Re:amaze will never post to or access anything in your personal account. This step is required because Facebook Pages are managed through personal accounts.

What the Facebook integration supports
The Re:amaze Facebook integration supports conversations originating from your Facebook business page, including:
- Page feed wall posts (regular public posts that customers can comment on)
- Page ad posts (boosted posts)
- Inbox messages (Facebook Messenger)
- Page reviews
- Page mentions (when people or other pages mention your page)
- Facebook Lead Ads (via Facebook Business)

Show Facebook icons in Re:amaze Chat
When your Facebook Page and Messenger account are connected, you can display their icons directly in Re:amaze Chat. To enable them, select the options for Show Facebook Icon in Embeddables and Show Facebook Messenger Icon in Embeddables.

Working with Facebook in Re:amaze
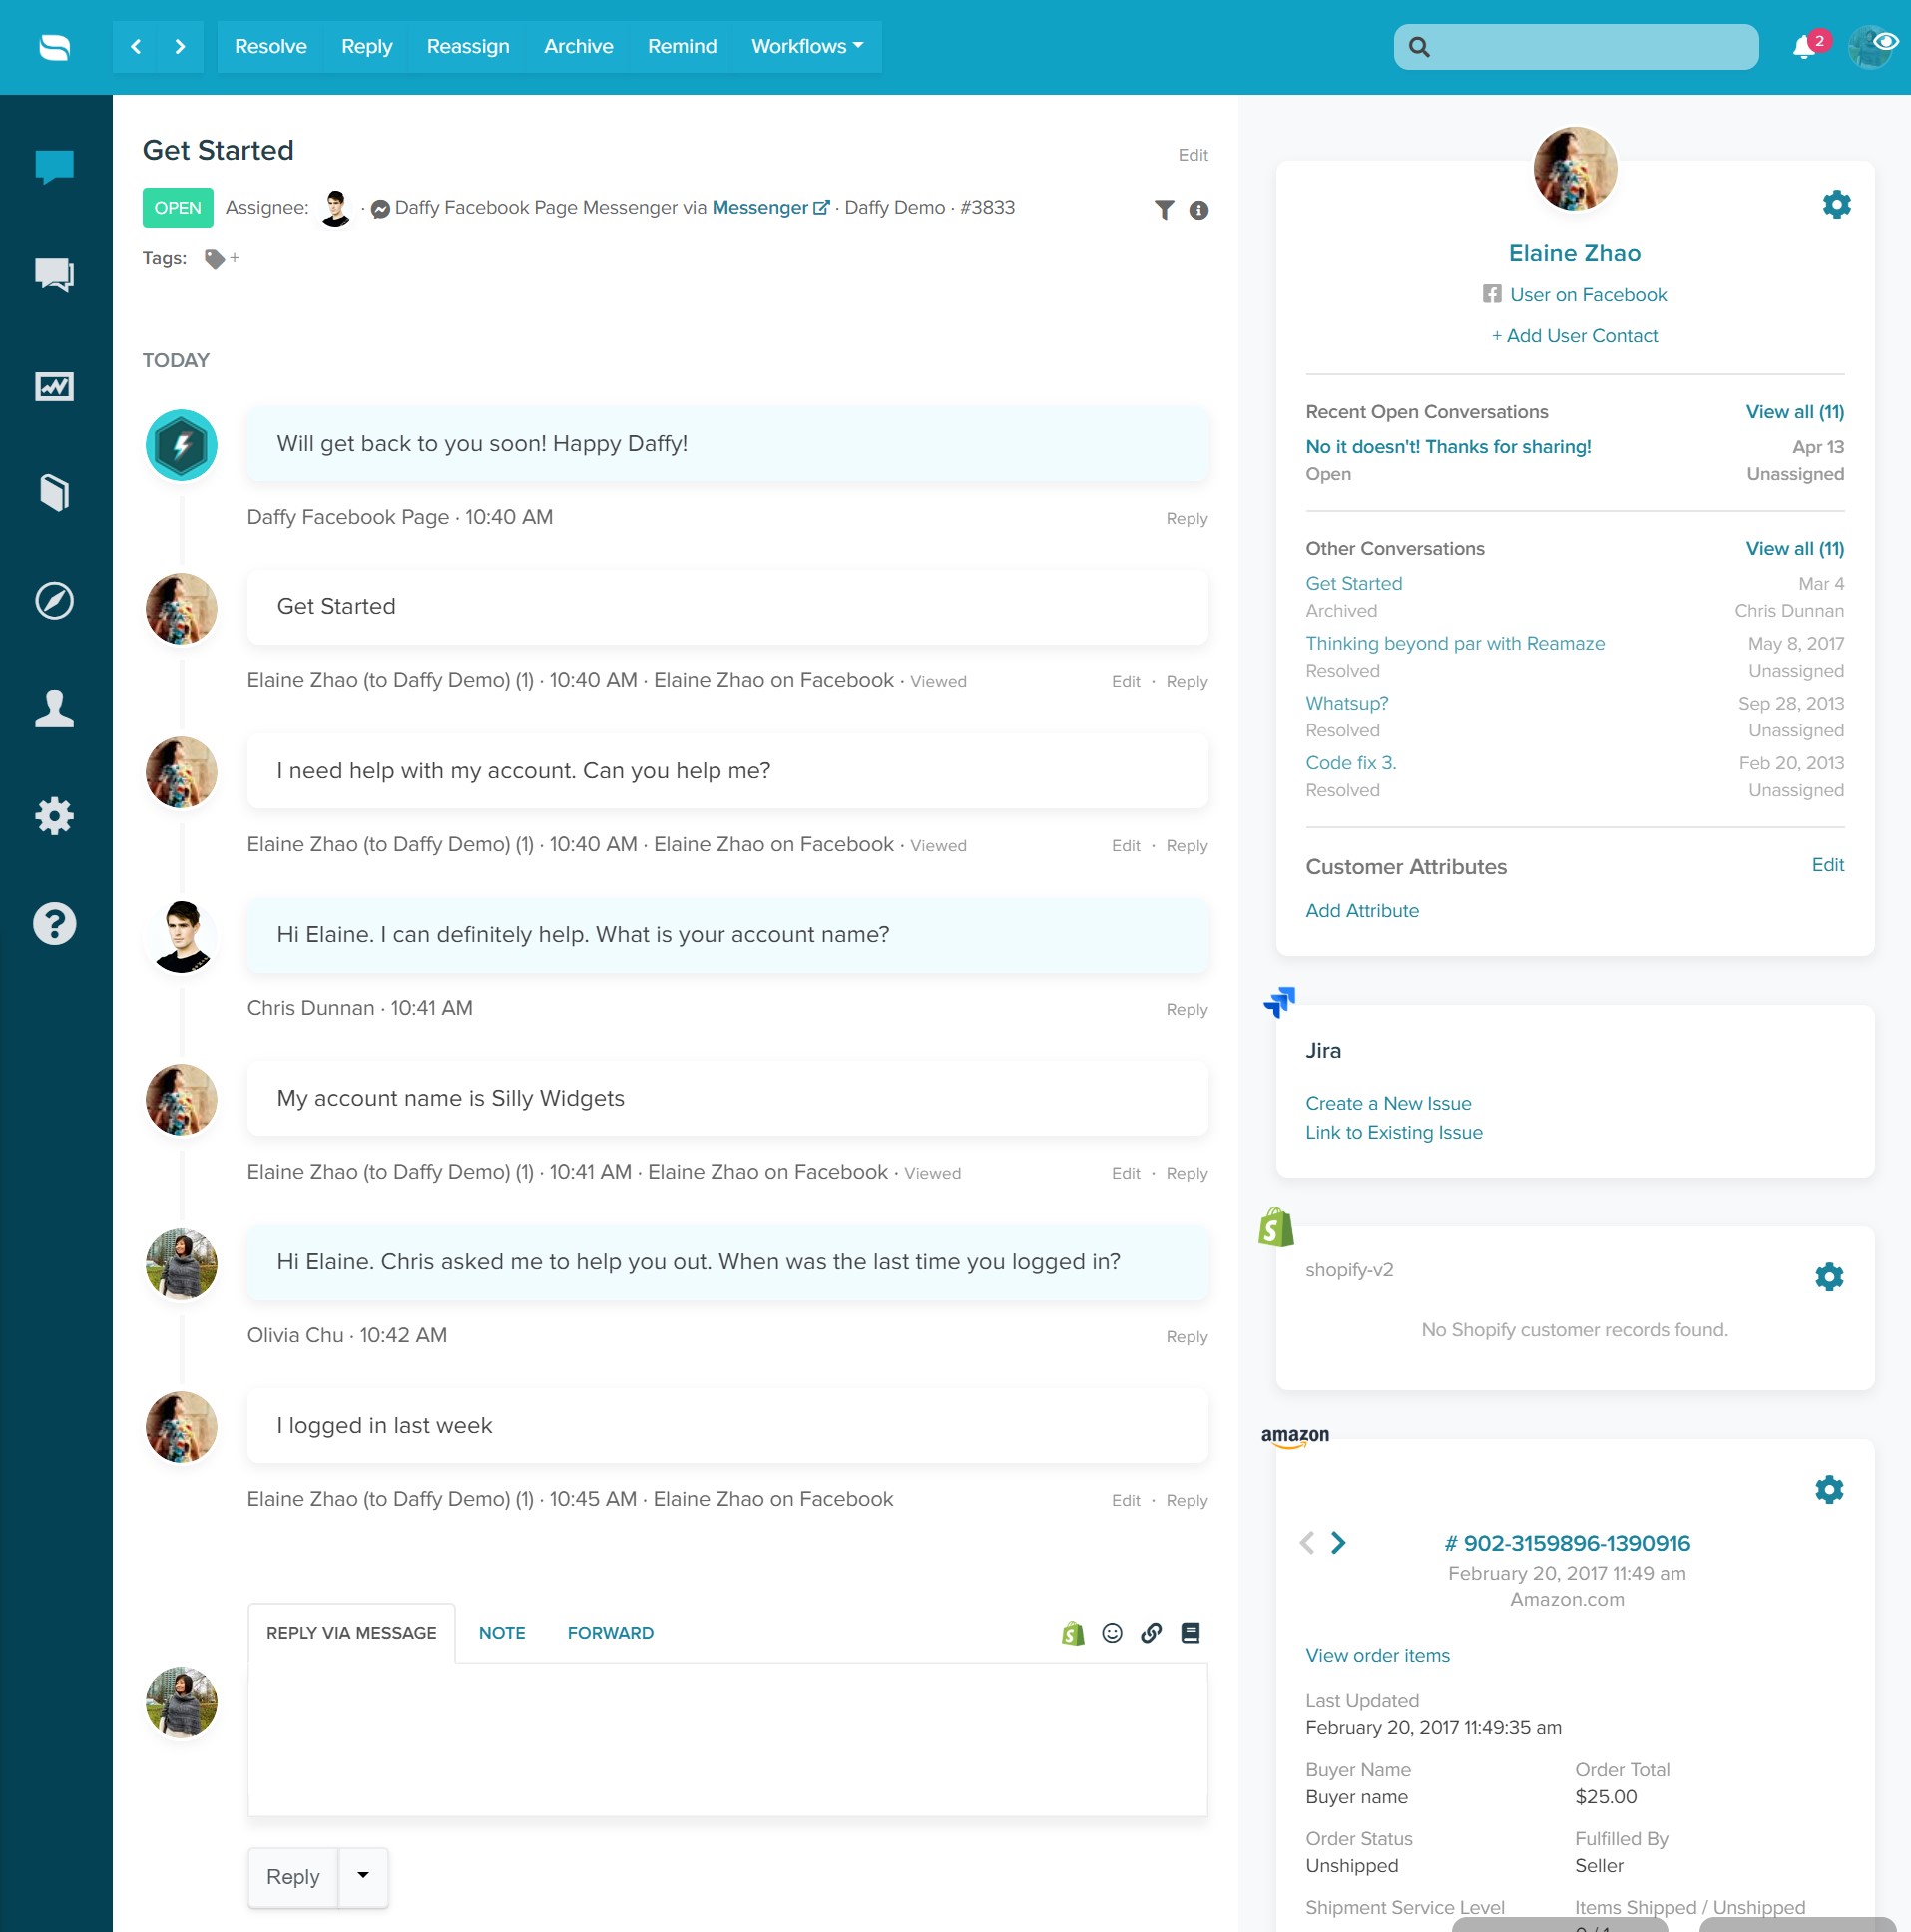
You can respond to Facebook customers directly from your Re:amaze dashboard. Responses are near instant, though you may notice slightly more lag compared to responding natively on Facebook due to Facebook API restrictions. Open a Facebook conversation or navigate to your Facebook channel filter to get started. Facebook messages, both comments and private messages, are imported in chronological order.

When a conversation is open, you can:
- Reply to the conversation as a whole via a wall post reply.
- Reply to a customer's wall post comment via Messenger (subject to a 30-day expiration limit).
- Reply to a Messenger message in real time.
- Reply to a specific message by selecting the Reply link beneath it.
- Like or ban a user depending on the post type.
- Leave an internal note for teammates.
- Forward the conversation to a third party.
All standard conversation controls are also available, including archive, assign, reassign, and remind.

Reply with individual staff personas
By default, replies to Facebook Messenger messages are sent as your Facebook Page identity. With the Personas feature enabled, each staff member can reply as themselves rather than as the page, displaying their individual name alongside your brand name.
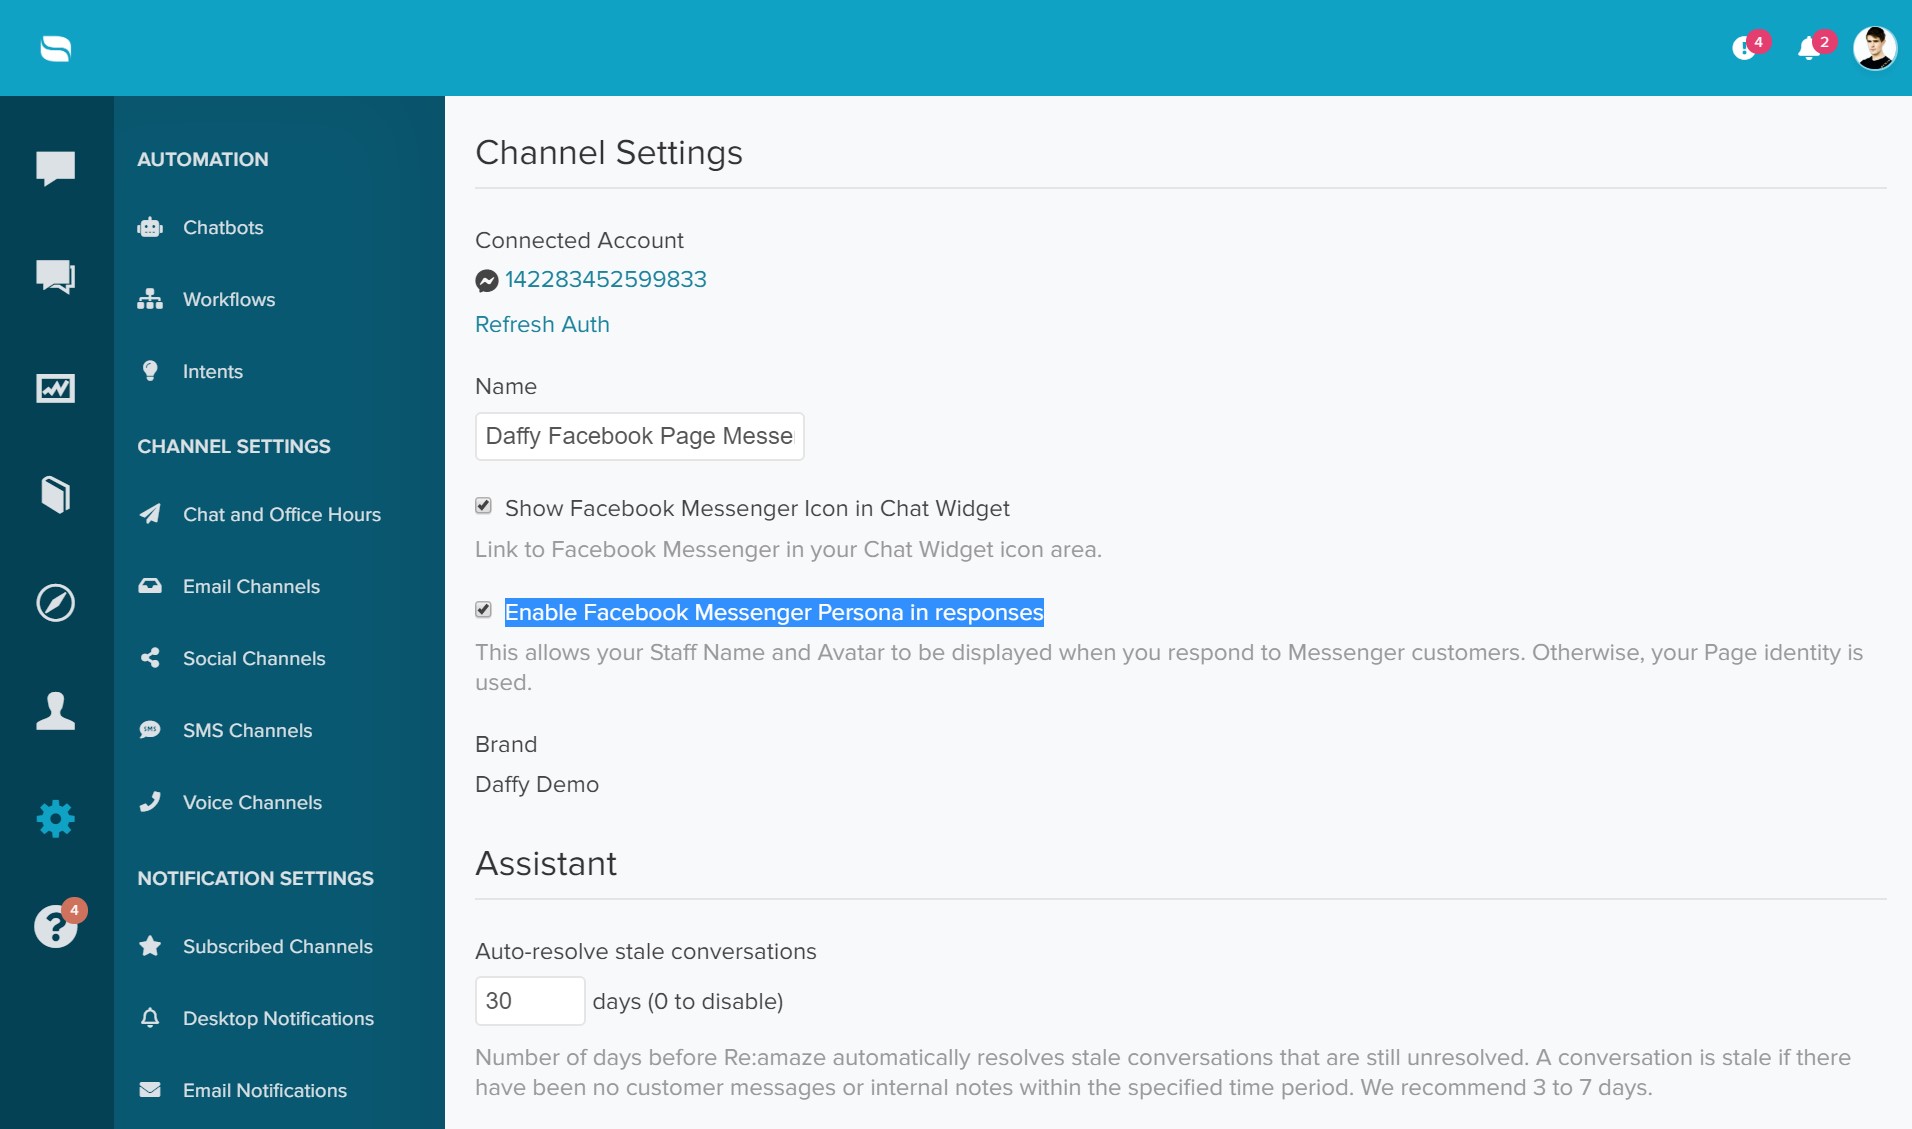
When personas are enabled, replies will display as, for example, "Chris Dunnan from Daffy Widgets" rather than simply "Daffy Widgets." This gives customers a more personal support experience and makes team collaboration more transparent.
Automate Facebook with workflows
Facebook comments and private messages can be automated in Re:amaze using Workflows. See the Workflows article to learn more. Set your message channel to Facebook and select an origin. Depending on your goals, you can automate tagging, assigning, or replying to Facebook messages.

What went wrong? (Optional)