Re:amaze and ActiveCampaign are both essential tools to help you create an exceptional customer journey. Whether you're looking to increase conversions from pre-purchase customers by keeping them in the loop about your products and services or if you're looking to automate your post-purchase support proactiveness, allowing a customer service platform like Re:amaze to be in sync with a marketing and sales automation platform like ActiveCampaign can boost efficiencies by more than 3x.
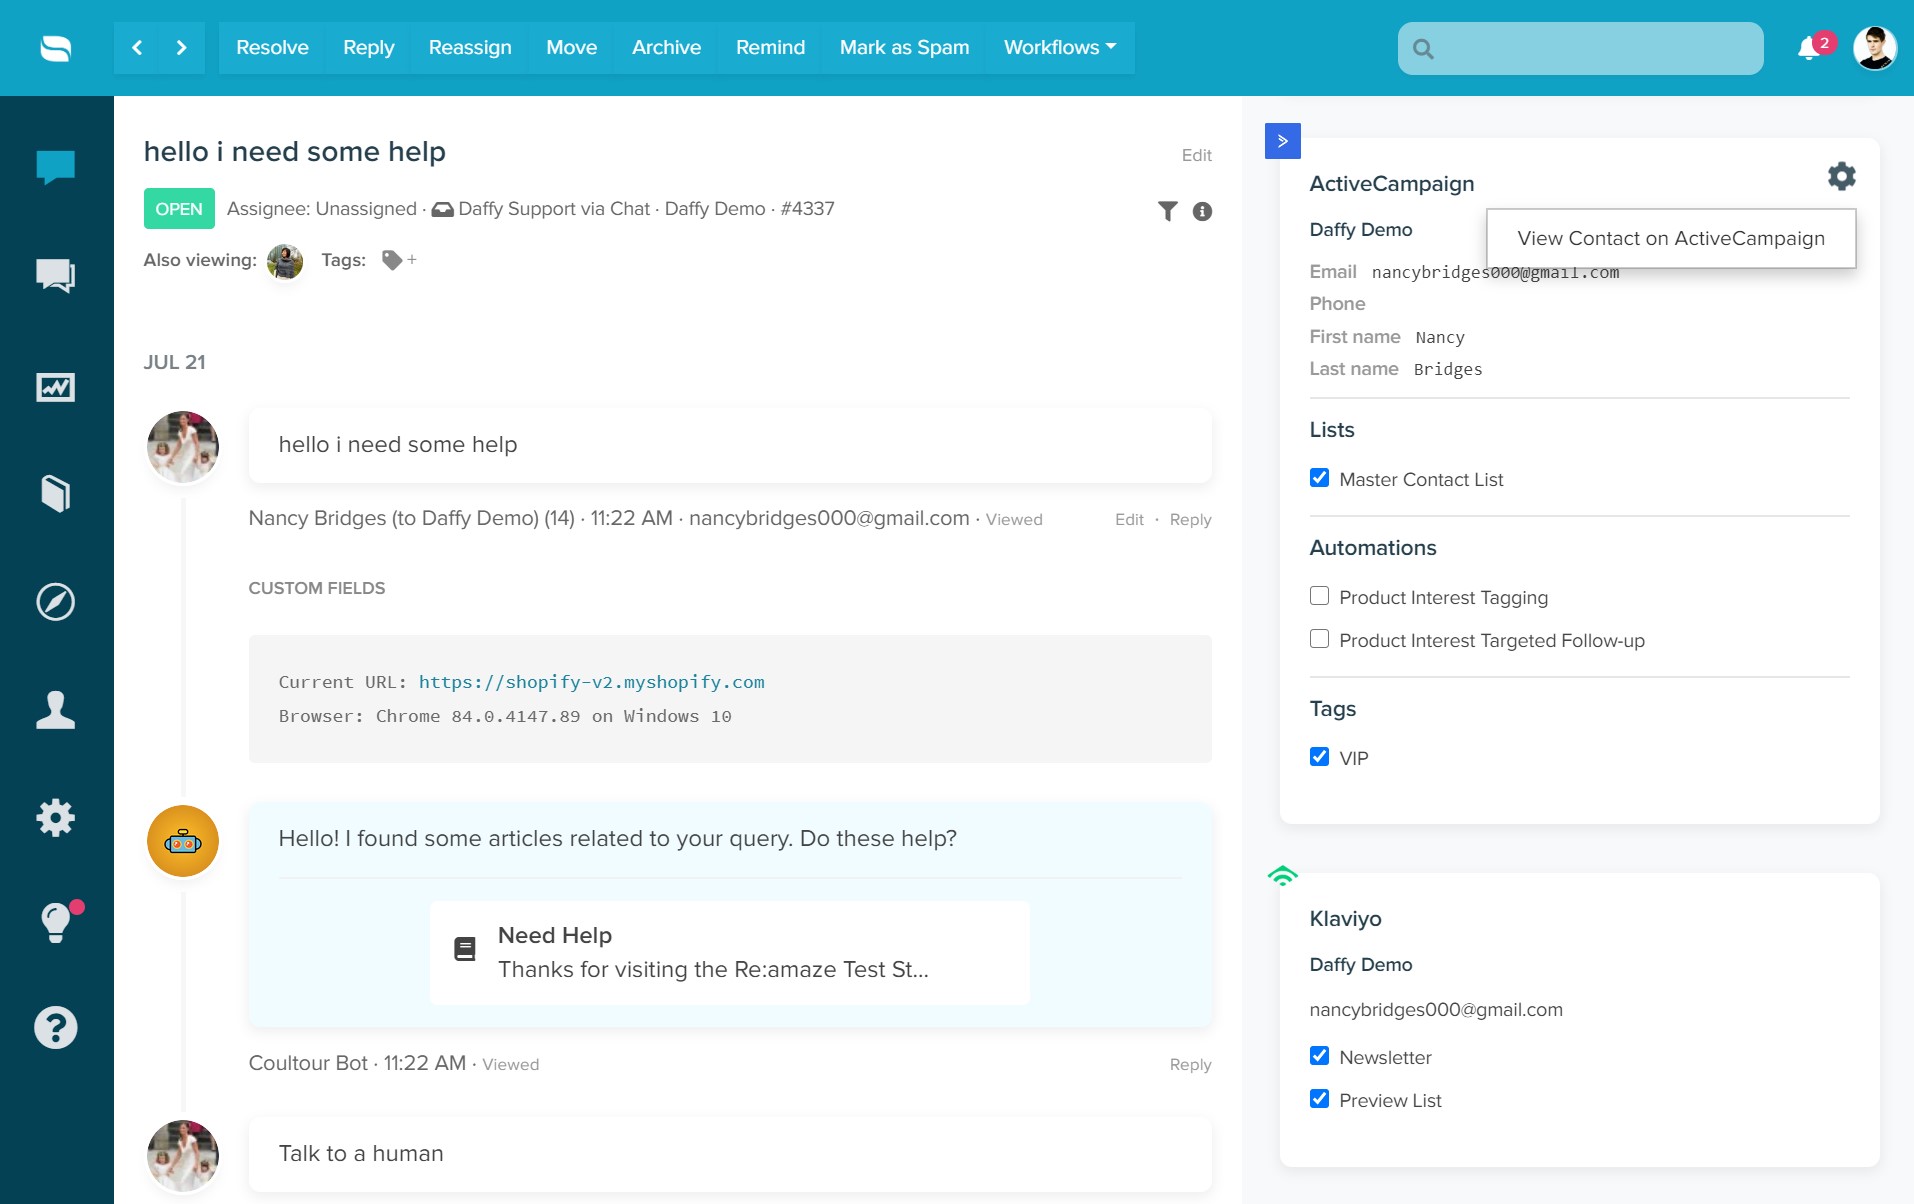
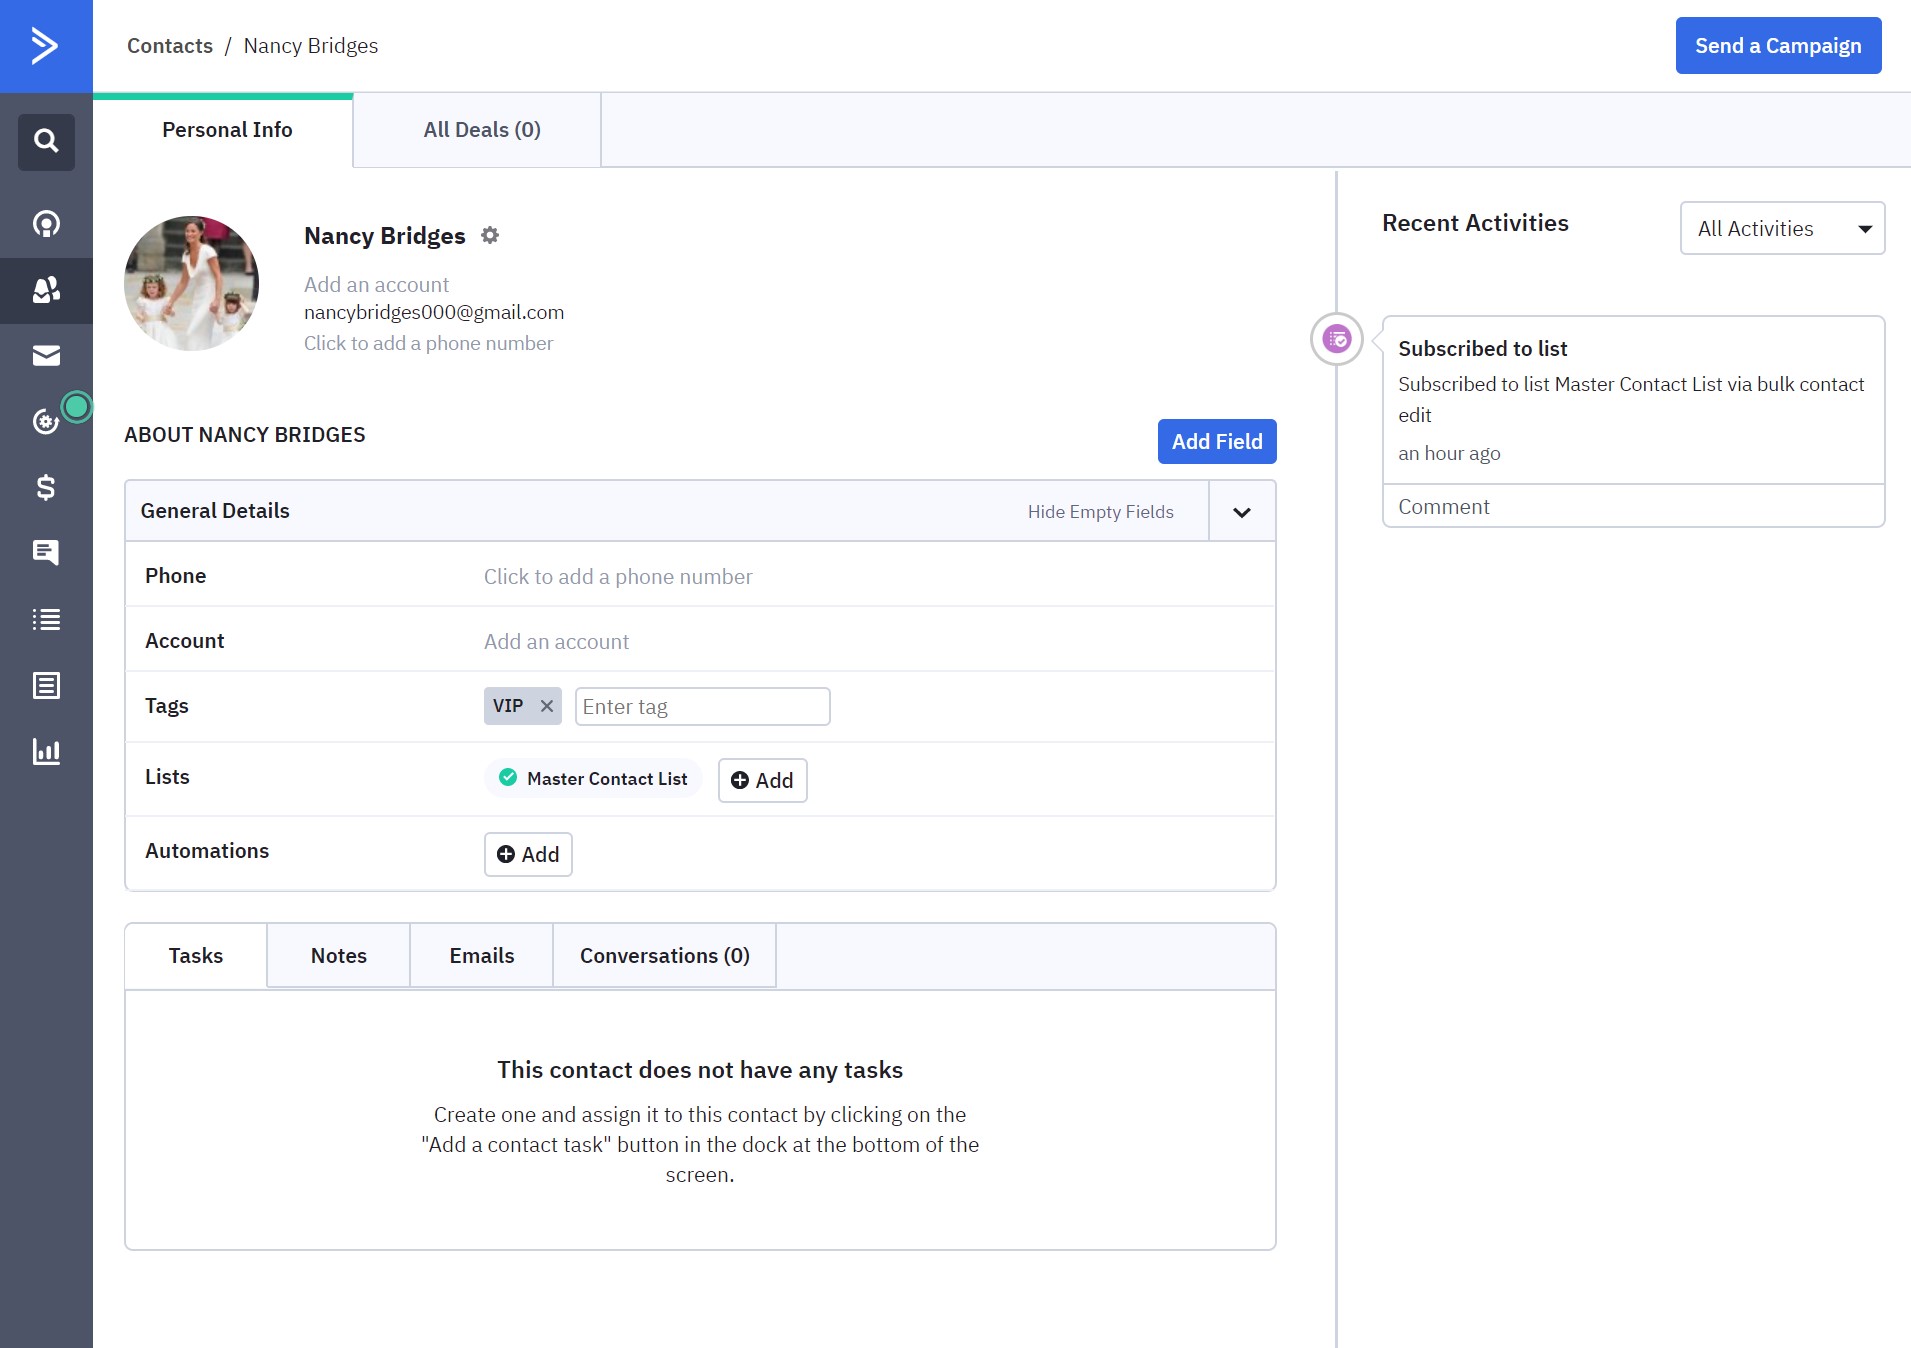
The ActiveCampaign integration for Re:amaze allows you to easily see and manage contacts' ActiveCampaign data such as:
- Email address
- Phone number
- First name
- Last name
- Lists a contact belongs to with the ability to add them or remove them from lists
- Automations that a contact is a part of
- Tags and the ability to apply or remove tags to contacts easily
Getting Started
Connecting your ActiveCampaign account to Re:amaze is simple:
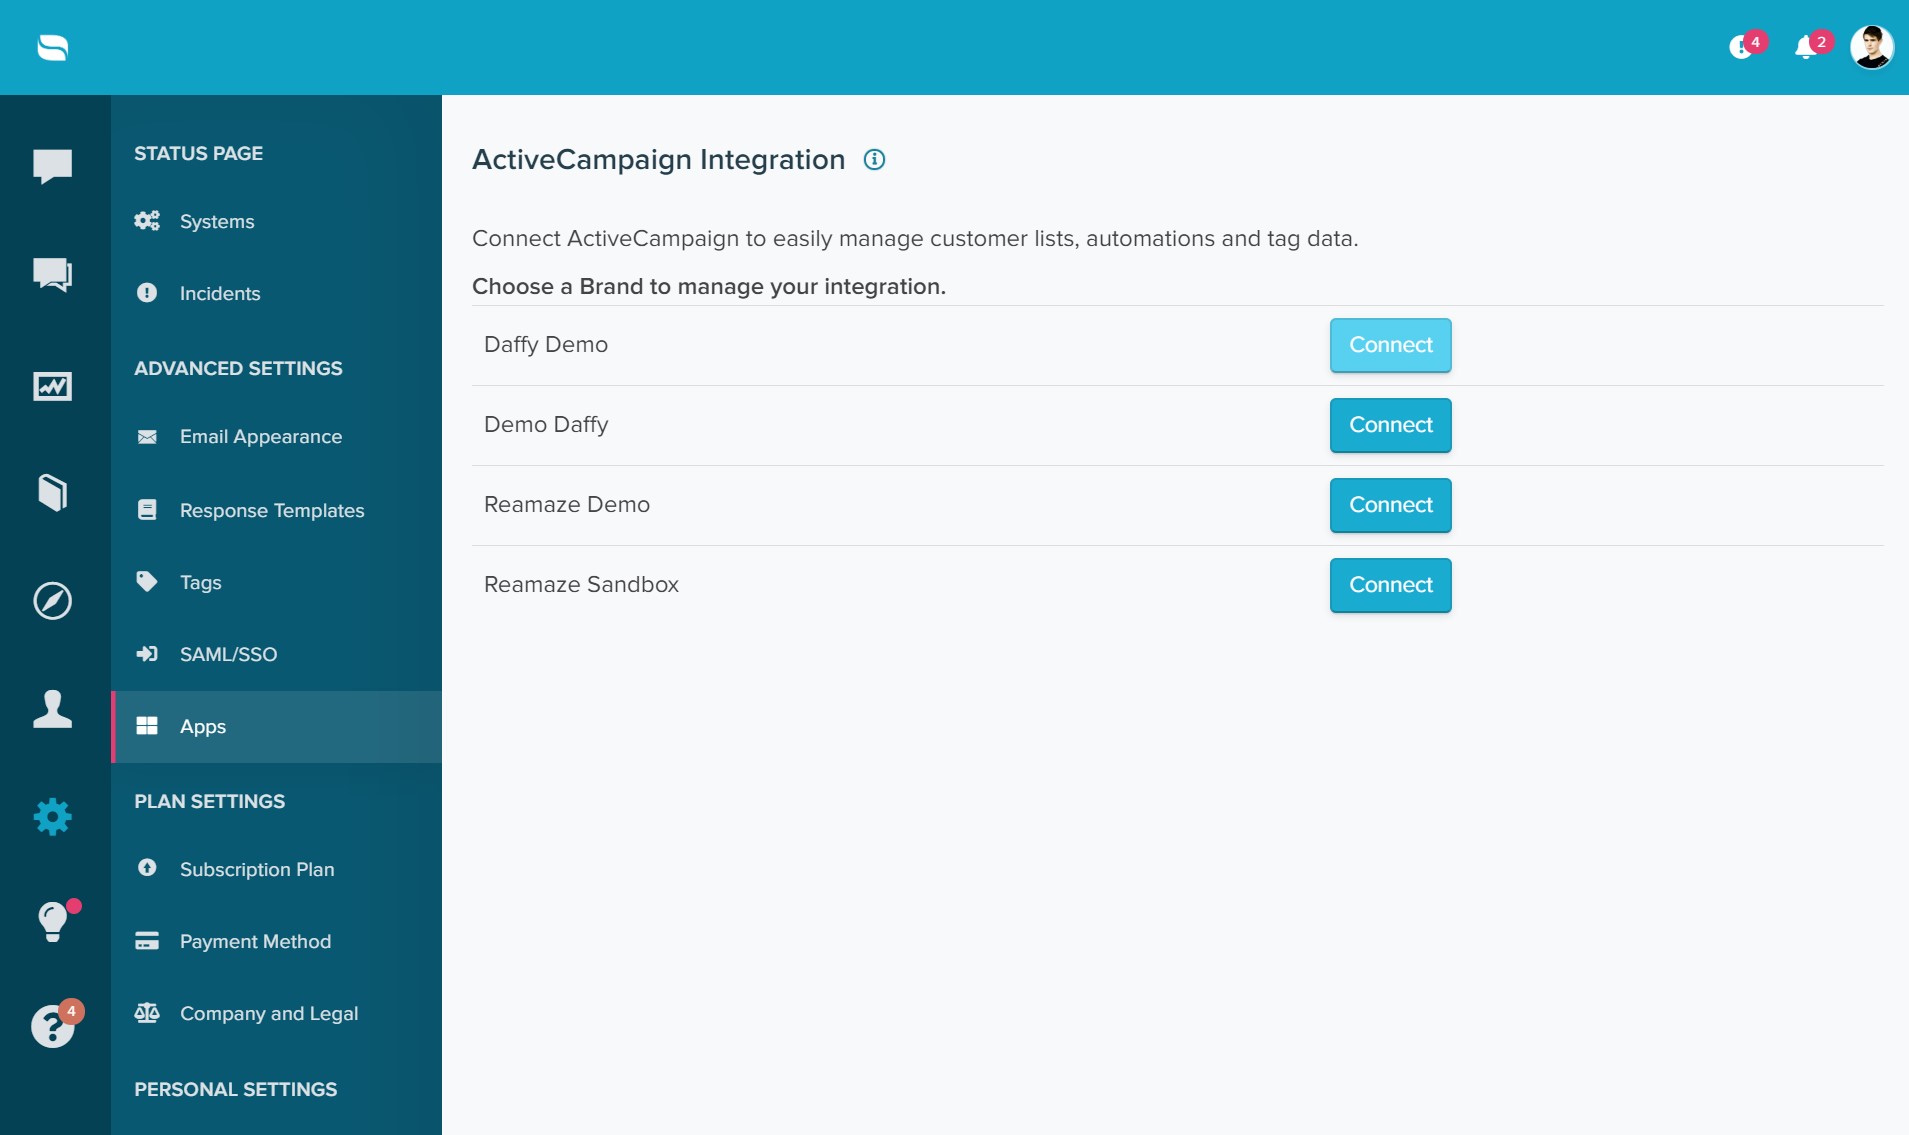
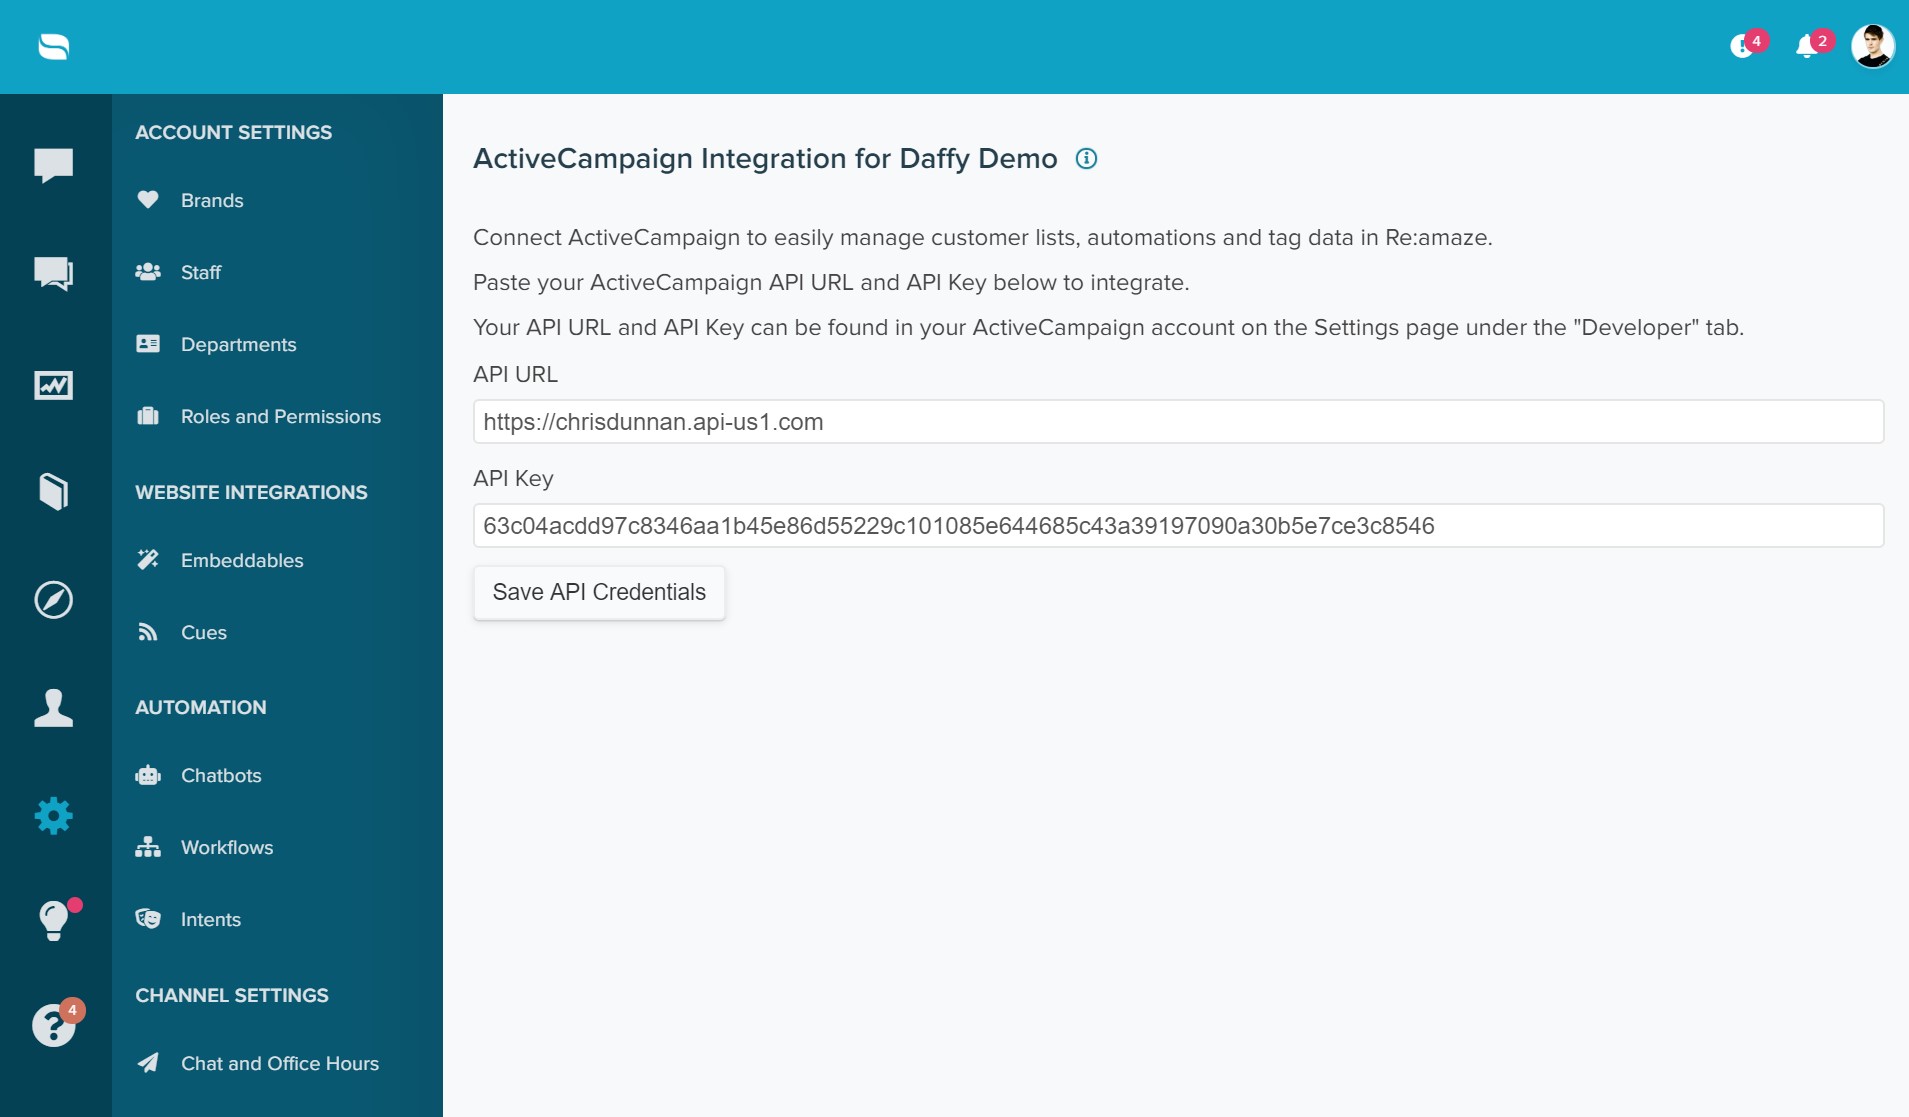
Log into your Re:amaze account and click on "Settings" and then "Apps". Select "ActiveCampaign" from the list of available integrations. Pick the brand you would like to connect an ActiveCampaign.
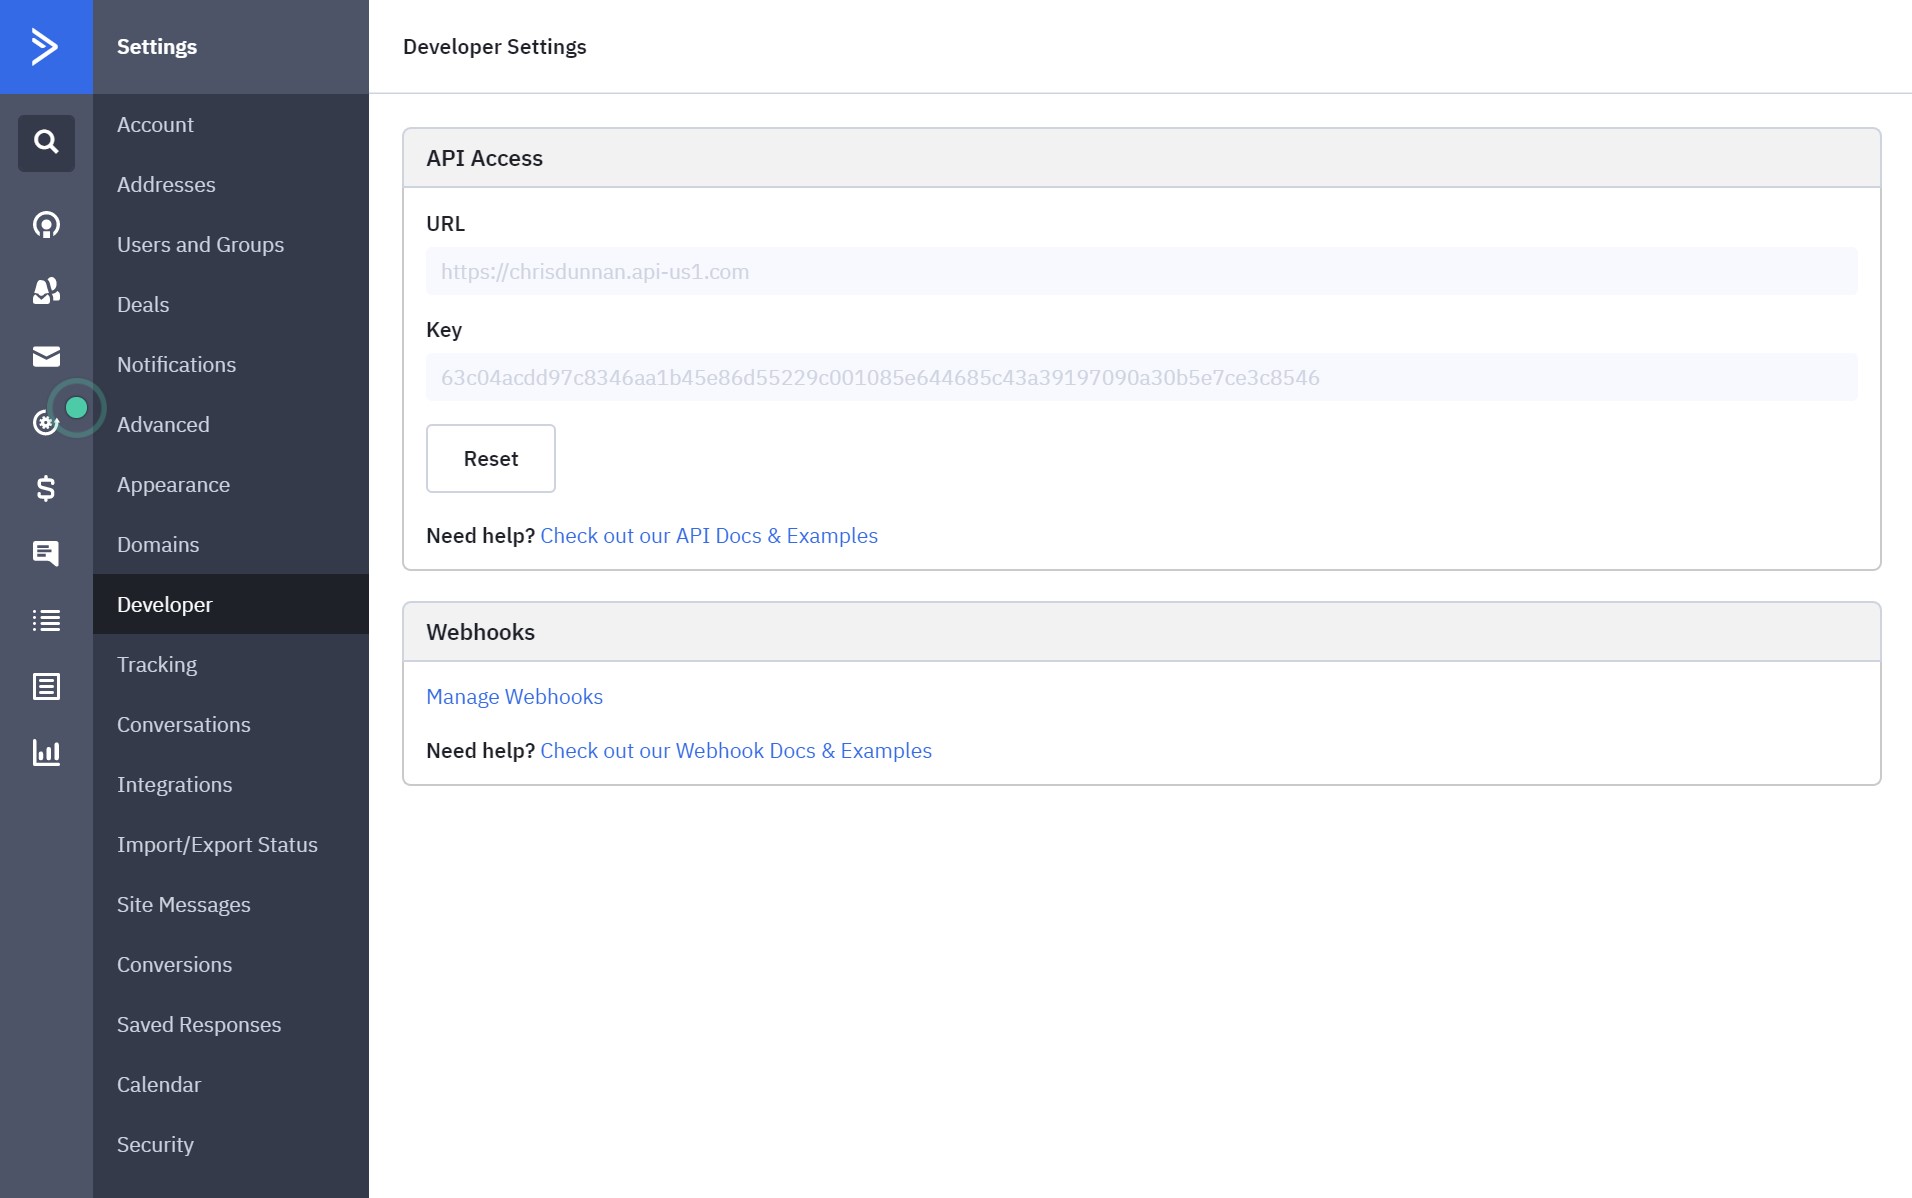
Log into your ActiveCampaign account and click on "Settings" and then on "Developer". Copy and paste the URL and Key parameters from the "API Access" section.
Paste these parameters back in Re:amaze app settings for ActiveCampaign. When you're ready, click "Save API Credentials" and wait for the green confirmation message. That's it!
Using the ActiveCampaign Integration
The ActiveCampaign data module will appear for contacts when they message you or when you open their profiles in Re:amaze, allowing you update contact information and ActiveCampaign settings quickly and easily.
Updating settings such as lists, automations, and tags sync to ActiveCampaign in real time so you never have to worry about missing specific changes.